

Cameras that can produce spherical 360 video are becoming more affordable and widespread these days, slowly making their way into the mainstream. The recently released Android-smartphone-specific Insta360 Air clip-on camera has joined a bunch of other entry level 360 cams like the Ricoh Theta S, the LG 360 Cam and Samsung’s Gear 360 to make this new exciting world of immersive visuals available for the crowd while more avantgardistic 360 aficionados are getting their fix with a GoPro-Omni rig or Nokia’s 40000 € Ozo. High-end 360 video solutions are still meant to be post-produced on a desktop machine but the consumer variants are closely tied to mobile devices already. The Insta360 Air connects to the microUSB or USB-C port of an Android phone and records the footage directly to the device. The other three aforementioned entry-level 360 cams can – unlike the Insta360 Air – also be used as a standalone camera without a (physical) connection to the phone but they all have companion apps that will help you to get the best shooting experience and control via a wireless connection. Furthermore, they make it very easy to directly transfer the footage from the camera to the phone for instant sharing or editing. YouTube and Facebook are the two big social networks that already support interactive 360 videos natively, Vimeo has recently added this feature as well. But before sharing, it’s very likely you want to perform some edits on your footage or combine a couple of clips to tell a story. This brings us to the topic of how you can edit 360 video directly on your Android device.
Oh wait! Just hold your horses for a second! Before actually tackling the editing options I think it’s helpful to address two subjects first to better understand the idiosyncracies of dealing with 360 video: stitching and metadata.
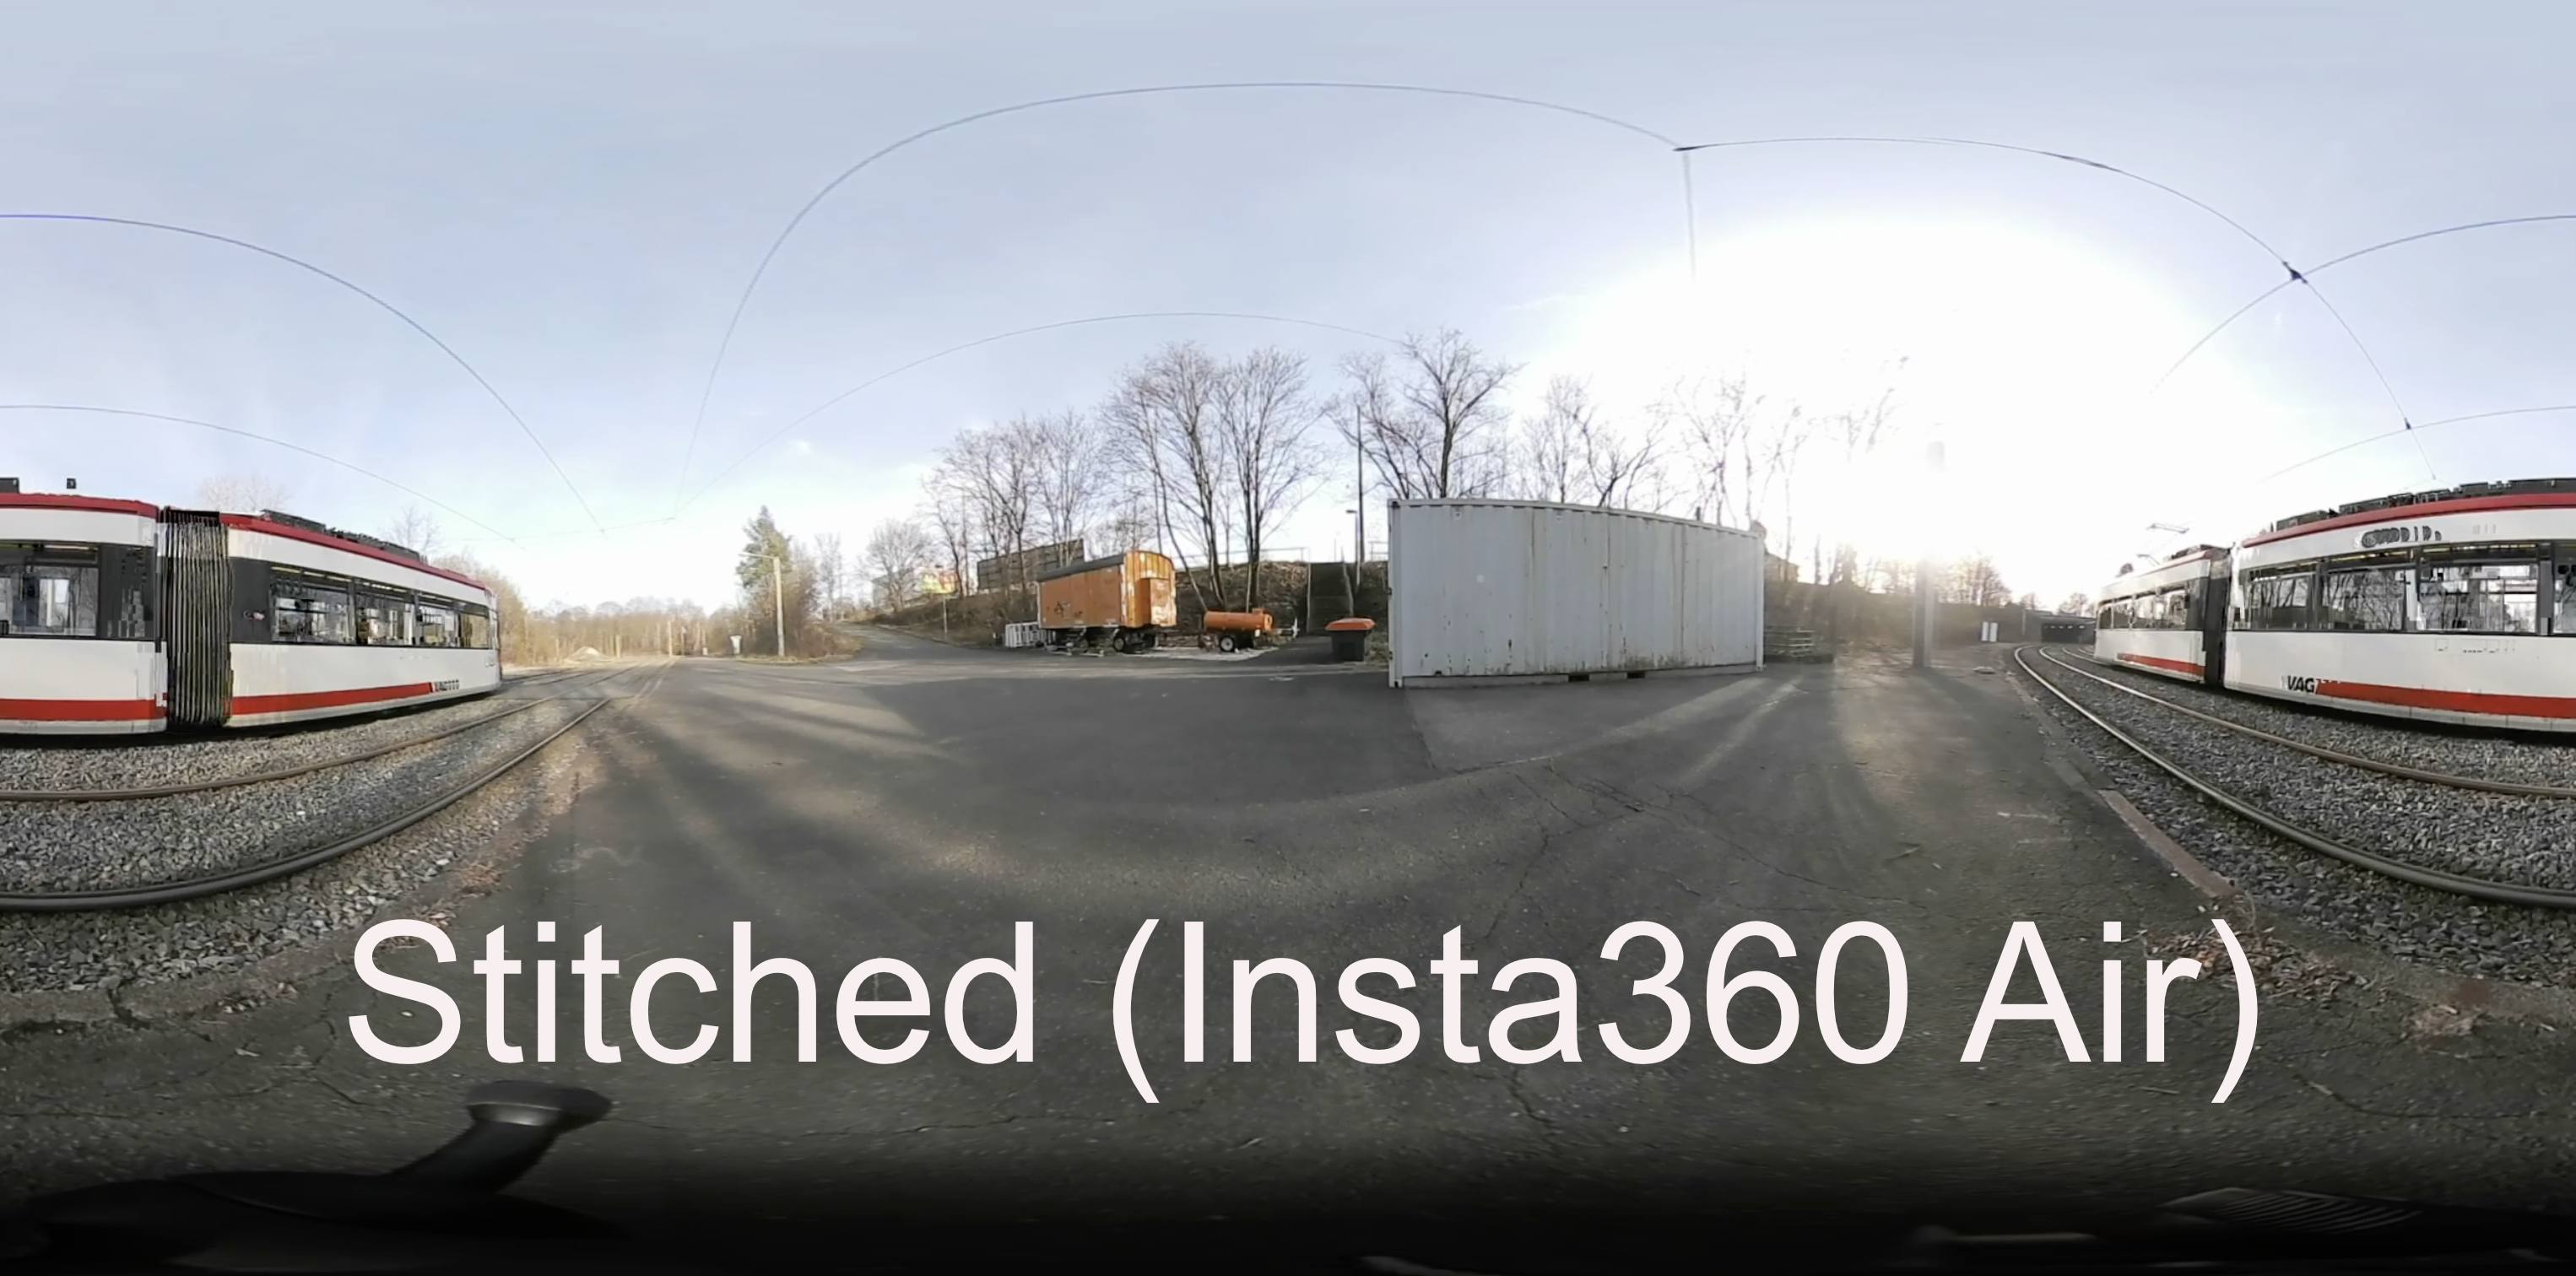
(Consumer) Camera technology is not (yet) at the point – at least as far as my knowledge goes – where you can record a spherical 360 image with only a single lens. To achieve a spherical 360 image, at least two lenses are used. These two lenses will give you two images which can be stored in a single file or in different files. Either way, to get one single image ready for spherical display (in the so-called “equirectangular” format) the two images need to be “stitched” together. The stitching can be done automatically by a software algorithm or it can be done manually in a specific editing program. When using a consumer 360 camera you will not have to bother with manual stitching as long as you transfer the files to the camera’s companion app which does the stitching for you automatically. You will only encounter “raw” un-stitched files if you pull the recorded files directly off the SD card without transferring them to the app first for stitching. Here are two screen grabs, one is un-stitched footage from the Gear 360, the other stitched footage from the Insta360 Air.

Important: Only stitched footage in equirectangular format will be displayed correctly as an interactive 360 video when you upload the file to YouTube or Facebook.
The other important thing to have the video displayed correctly as an interactive 360 video in a dedicated player is metadata. It’s data embedded in the video file that will “tell” the player that the file is a 360 video. I’ve used the term “interactive” repeatedly, what do I mean by it? It means that you can interactively change the perspective in the video, either by dragging your finger around the screen or by panning/tilting your device (making use of the phone’s gyroscope). If there’s no metadata in the file, the player will just display a flat, equirectangular video that you can’t interact with. And halleluja, this finally sends us off to our actual topic – editing 360 video on Android – because, depending on what editing app you choose, the exported video still has the 360 metadata in it – or not (in which case it will have to be re-injected).
So there are basically three options to edit and produce 360 video on your Android device:
- the camera’s companion app
- a dedicated 360 video editing app
- a regular video editing app + an app that re-injects metadata
When should you use which option?
- You only want to trim the beginning/end of a single clip and/or add a filter. You don’t want to mess around with re-injecting metadata.
- You want to build a story with multiple clips. You want to have more editing options & features like changing the default viewing angle, speed or add music/audio. You want to keep the metadata in the file.
- You want to build a story with multiple clips. You want a timeline environment, not a storyboard. You want the full feature set of your regular Android video editing app including precise placement/length of titles, music, voice-overs, graphics, transitions etc. You want to work on multiple projects at the same time. You don’t mind loosing a bit of vertical resolution. You don’t mind the “Black Hole Sun” syndrome. You don’t mind not having an ‘interactive’ preview. You don’t mind re-injecting metadata.
Using a 360 camera’s companion app
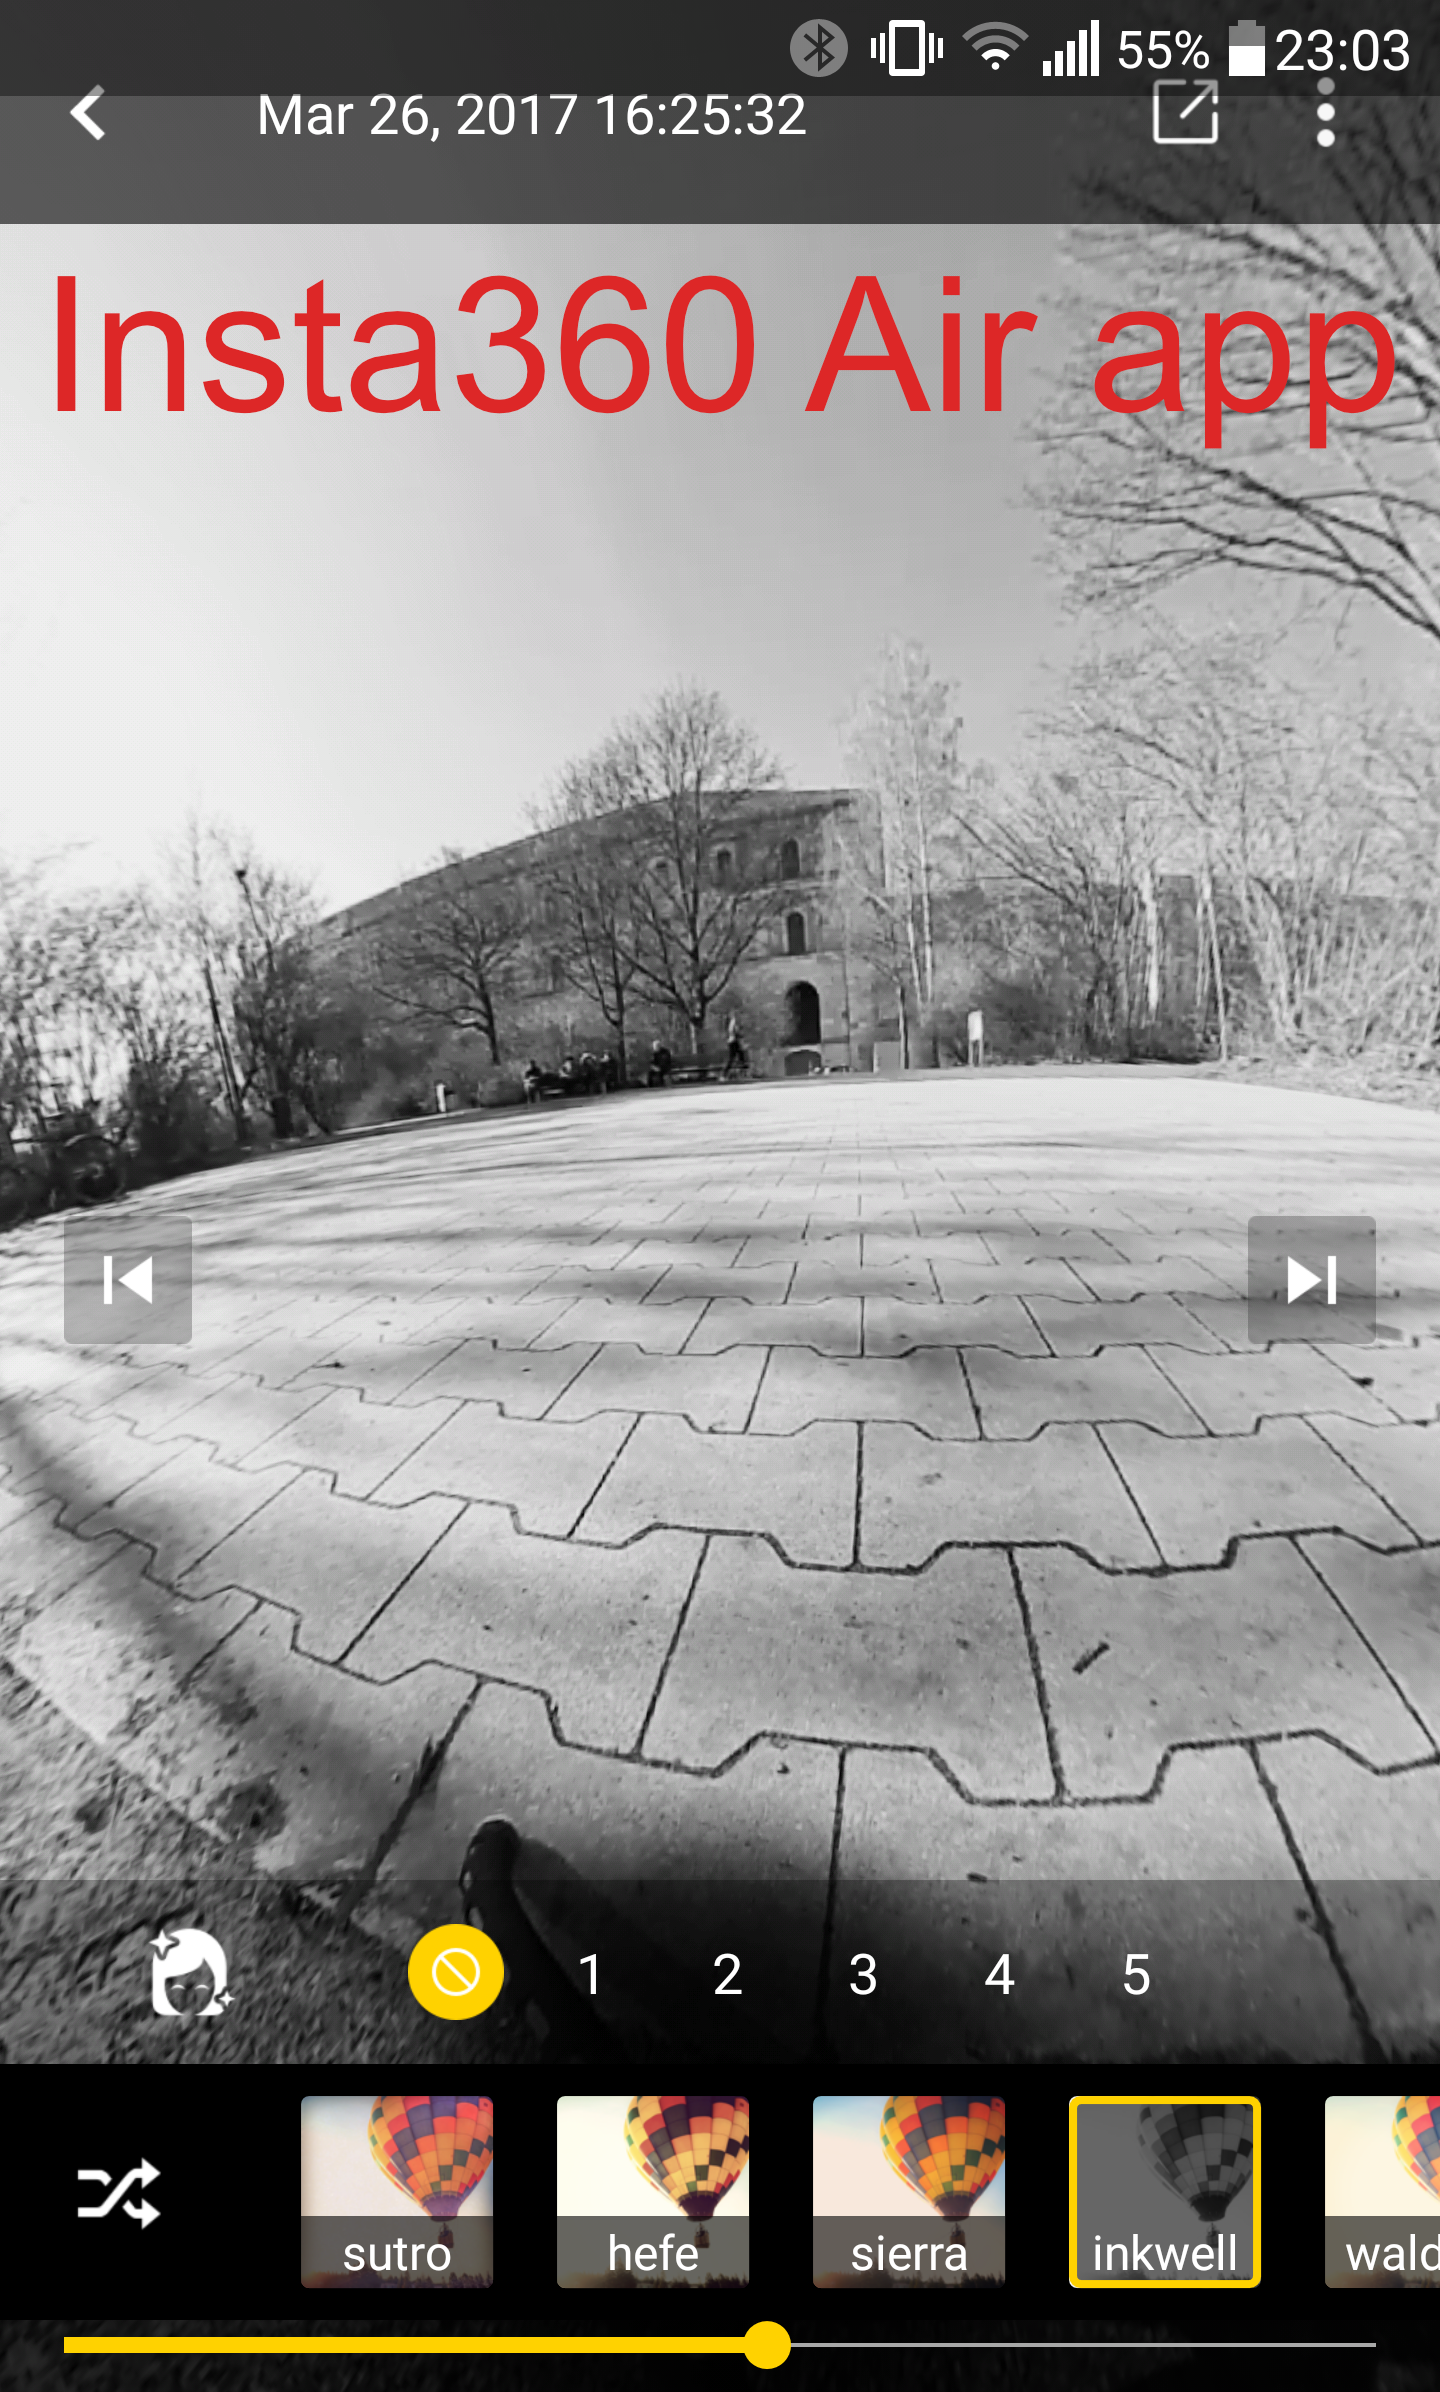 If you use the editing options of a 360 camera’s companion app, you will only be able to perform extremely basic edits when the end product should be an interactive 360 video. For instance, the companion app for the Insta360 Air only lets you add a filter from their selection, like black&white or some other Instagram-inspired ones. You can’t even trim the beginning or the end of the clip which definitely would come in handy if you don’t intend to be in the shot. Unlike with the Insta360 Air app you can do this kind of top & tail trimming in Samsung’s Gear 360 Manager app and Recoh’s Theta+ Video. The latter also lets you add a filter and music before exporting. I can’t really say anything about the companion app for the LG 360 Cam as I neither have one nor do I know somebody who owns it. But I very much assume that it won’t go beyond the features discussed here. Btw, if you want to share to a network that does not (yet) natively support 360 video (like Twitter, Instagram, WhatsApp or Snapchat) you might want to transform the video into a “Tiny Planet” or “Magic Ball” format which (most) companion apps let you do. But as this blog post is about ‘real’ interactive 360 video, I won’t go further into details here. The same goes for desktop editing software that is provided by the camera companies (like Insta360Studio or the Gear 360 Action Director) because we are focusing on mobile-only solutions.
Using a dedicated 360 video editing app
While often Android users are served less generously or belatedly regarding certain high-profile apps compared to Apple’s iOS users, they can actually be trailblazers when it comes to mobile 360 video editing! There are already two genuine 360 video editing apps in Google’s PlayStore (not a single one for iOS yet): Collect and V360. Both of them are still in beta (update: V360 has been officially released in the meantime) and relatively basic when compared to more advanced “regular” video editing apps but they cover the basics pretty well and appear generally very promising at this early stage. The most important thing is that – unlike the companion apps – they actually let you build a story out of multiple clips. When compared to each other, Collect comes off as the more advanced and visually slightly slicker app with a couple of more features but a minor drawback in the exporting process.
 But let’s talk about V360 first, it’s plain simplicity may even make it a better choice when doing your very first 360 video edit. Upon firing up the app you can either multi-select a couple of 360 video clips or just select one and add other clips later. One very helpful thing is that there’s a slider button that when activated shows only 360 video clips, not your whole camera roll. When you’re done you’ll get to the storyboard (storyboard means each clip thumbnail has the same size no matter how long or short the video clip is). By swiping your finger around the preview area or moving around your phone you can explore the different parts of the 360 video. If you want to edit a clip you just tap on the pen icon below the storyboard: You can trim (top & tail), delete or duplicate the clip. There’s also an option to sort the clips (newest/oldest first) but that didn’t really work work me. If you want to rearrange the order of the clips in your story you long-press the clip and then drag it to its new place in the storyboard. You have the chance to add music or another audio clip to the storyboard. Keep in mind though that this audio will play through the whole clip, you cannot have it come in or go out at a certain point. There is however an option to adjust the music volume for the whole video. By tapping on the speaker icon you can change the volume relation between the sound from the video and the audio clip in three steps. Upon export you will find that fortunately the resolution is the same as your source material and that the metadata is still in place but also – a bit less enthusiastically – that a V360 branded outro has been added. Hopefully they will give you the chance to disable it with a future update.

 If you’re longing for something slightly more advanced then you should check out Collect. After selecting your clips you will find that the idea of circularity is a clever UI theme for a 360 video editing app. The thumbnails of the storyboard are circular and the preview window has a circular mask to help you imagine what the point-of-view will be like for the viewer when watching the video in VR mode with goggles. If you tap on one of the clips and enter the edit screen you will also find that the trim handles for the clip are built into a circle. Btw don’t worry about the trim handles already having been moved without you doing anything – when adding the clips to the storyboard the app does sort of a quick “auto-edit” but all of it is reversible. However I’d prefer to have this as an option to enable rather than a default setting. While letting you add some audio to the story (but just like V360 it plays through the whole video), Collect has a couple of more features up its sleeve: You can add a color filter, change the speed (slow, normal, fast) of the video and – that could be the most important thing – change the default viewing angle so viewers initially look into the direction you want them to look when a new clip starts. If you don’t know what it’s for I assume it can be a bit confusing for beginners though. Another nice feature is the ability to add a custom watermark (a square PNG image with maximum size of 1024×1024, transparency is supported) at the bottom of the image. While I am hoping that future updates will add a few more features like a basic title tool or the ability to switch to a timeline mode which gives you more control over the placement of audio tracks, the biggest flaw of this really cool app at the moment is that the resolution of the exported file is always 3840×2160. If you’re working with Gear 360 footage (which has a maximum resolution of 3840×1920), things are fine but if you use footage from another camera with lower resolution like the Insta360 Air that has a maximum video resolution of 2560×1280 on most phones, the image will get softer because of the upscaling. It would be good to have the option to keep the source material’s original resolution when exporting. Like V360 the app preserves the metadata upon export. One more thing: It’s very cool that they integrated an in-app messenger-like service for giving feedback to the developer team. So speak your mind if you have suggestions!
One thing that both Collect and V360 are lacking is the ability to save/manage multiple projects at the same time. Right now, you have to finish one project before starting a new one. And while you can’t work on different projects at the same time in either of these apps, V360 does save your current project even if you leave the app or eliminate it from the background tasks. Collect on the other hand does save your project as long as you keep the app running in the background, if you clear out the background apps your project will be lost! This is definitely something that both apps (especially Collect) should improve upon.
Using a regular video editing app
The ability to save multiple projects and going back to them for adjustments later is (currently) one of the big advantages when using a ‘regular’ Android video editing app for 360 video. Also, if you want to use titles, place audio files including voice overs at certain points, add transitions or just generally have the full feature set of a more advanced mobile editing app at hand, this is the better choice – it’s a slightly different workflow though and there are some caveats as well. By far the best two video editing apps on Android are KineMaster and PowerDirector, so I will only talk about these two champions here although you might also be able to use another video editing app. While PowerDirector already supports 4K/UHD footage on powerful enough devices, KineMaster has just released a beta version that includes 4K/UHD footage support as well (again the device – or more precisely its chipset – needs to be powerful enough to handle it) but the official release version is (for now) limited to FHD. While 4K/UHD still hasn’t exactly penetrated the mainstream as the standard resolution for ‘regular’ video, it’s a crucial point in the 360 video world because spread over a vastly larger area than in a regular non-360 image, a FHD resolution only looks like SD at best. So if you want something that at least comes a bit closer to an HD (720p) feeling, 4K/UHD footage is needed. You also have to consider that the most common aspect ratio of 360 video is not 16:9 but 2:1 (or 18:9) so you will lose a bit of vertical resolution. Let’s have a look at what kind of footage you can import into KineMaster and PowerDirector (please note that less powerful devices may not support the highest resolutions).
KineMaster currently supports a maximum resolution of 1920×1080 (FHD; 4K/UHD support is in the pipeline as mentioned before) and a maximum frame rate of 30fps. This means you can import footage from the Ricoh Theta S (1920×1080, 30fps) in full but you will have to go for lower resolutions and some pixel loss with footage from the Insta360 Air (2560×1280 does not work, only 1920×960, both 30fps) and Gear 360 (3840×1920 and other lower resolutions don’t work, only 1920×960, 30fps). The video will appear in and export from KineMaster in a common FHD resolution of 1920×1080 (having to fill the vertical resolution from 960 to 1080) so there will be some black letter-boxing which eventually results in what I like to call the “Black Hole Sun” (of course paying homage to a certain tune …) syndrome when viewing it as an interactive 360 video: a small black circle at the top and bottom of the image. You can watch the sample video here (make sure to watch it in highest possible resolution). 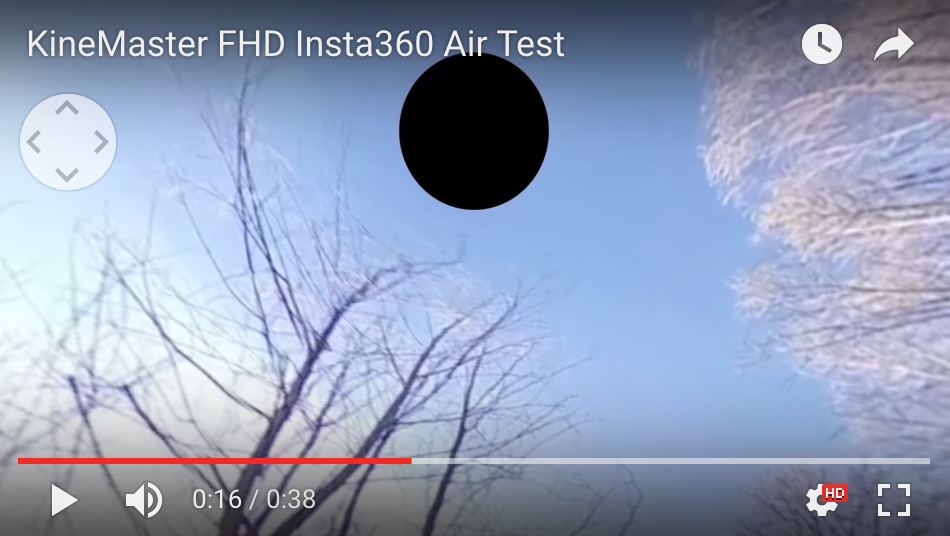 A quick warning for those usually producing PAL video content with a frame rate of 25fps (which KineMaster allows): Since the footage on these cameras can only be captured with 30fps, set the export frame rate in KineMaster‘s settings to 30 as well for the best result – and it’s the more ‘natural’ standard for platforms like YouTube and Facebook.
If you are running PowerDirector on a device that supports 4K/UHD editing you can import Insta360 Air footage shot in 2560×1280 (30fps) but have to decide wether you want to export it downscaled to 1920×1080 (FHD) or upscaled to 3840×2160 (UHD). You can check my two sample videos (FHD & 4K, make sure to watch it in highest possible resolution) to decide which option you like better quality-wise. The ability to import 4K/UHD footage in PowerDirector also lets you use Gear 360 footage at maximum resolution (3840×1920, 30fps) but as the regular UHD format is 3840×2160, your video will also suffer from the “Black Hole Sun” syndrome.
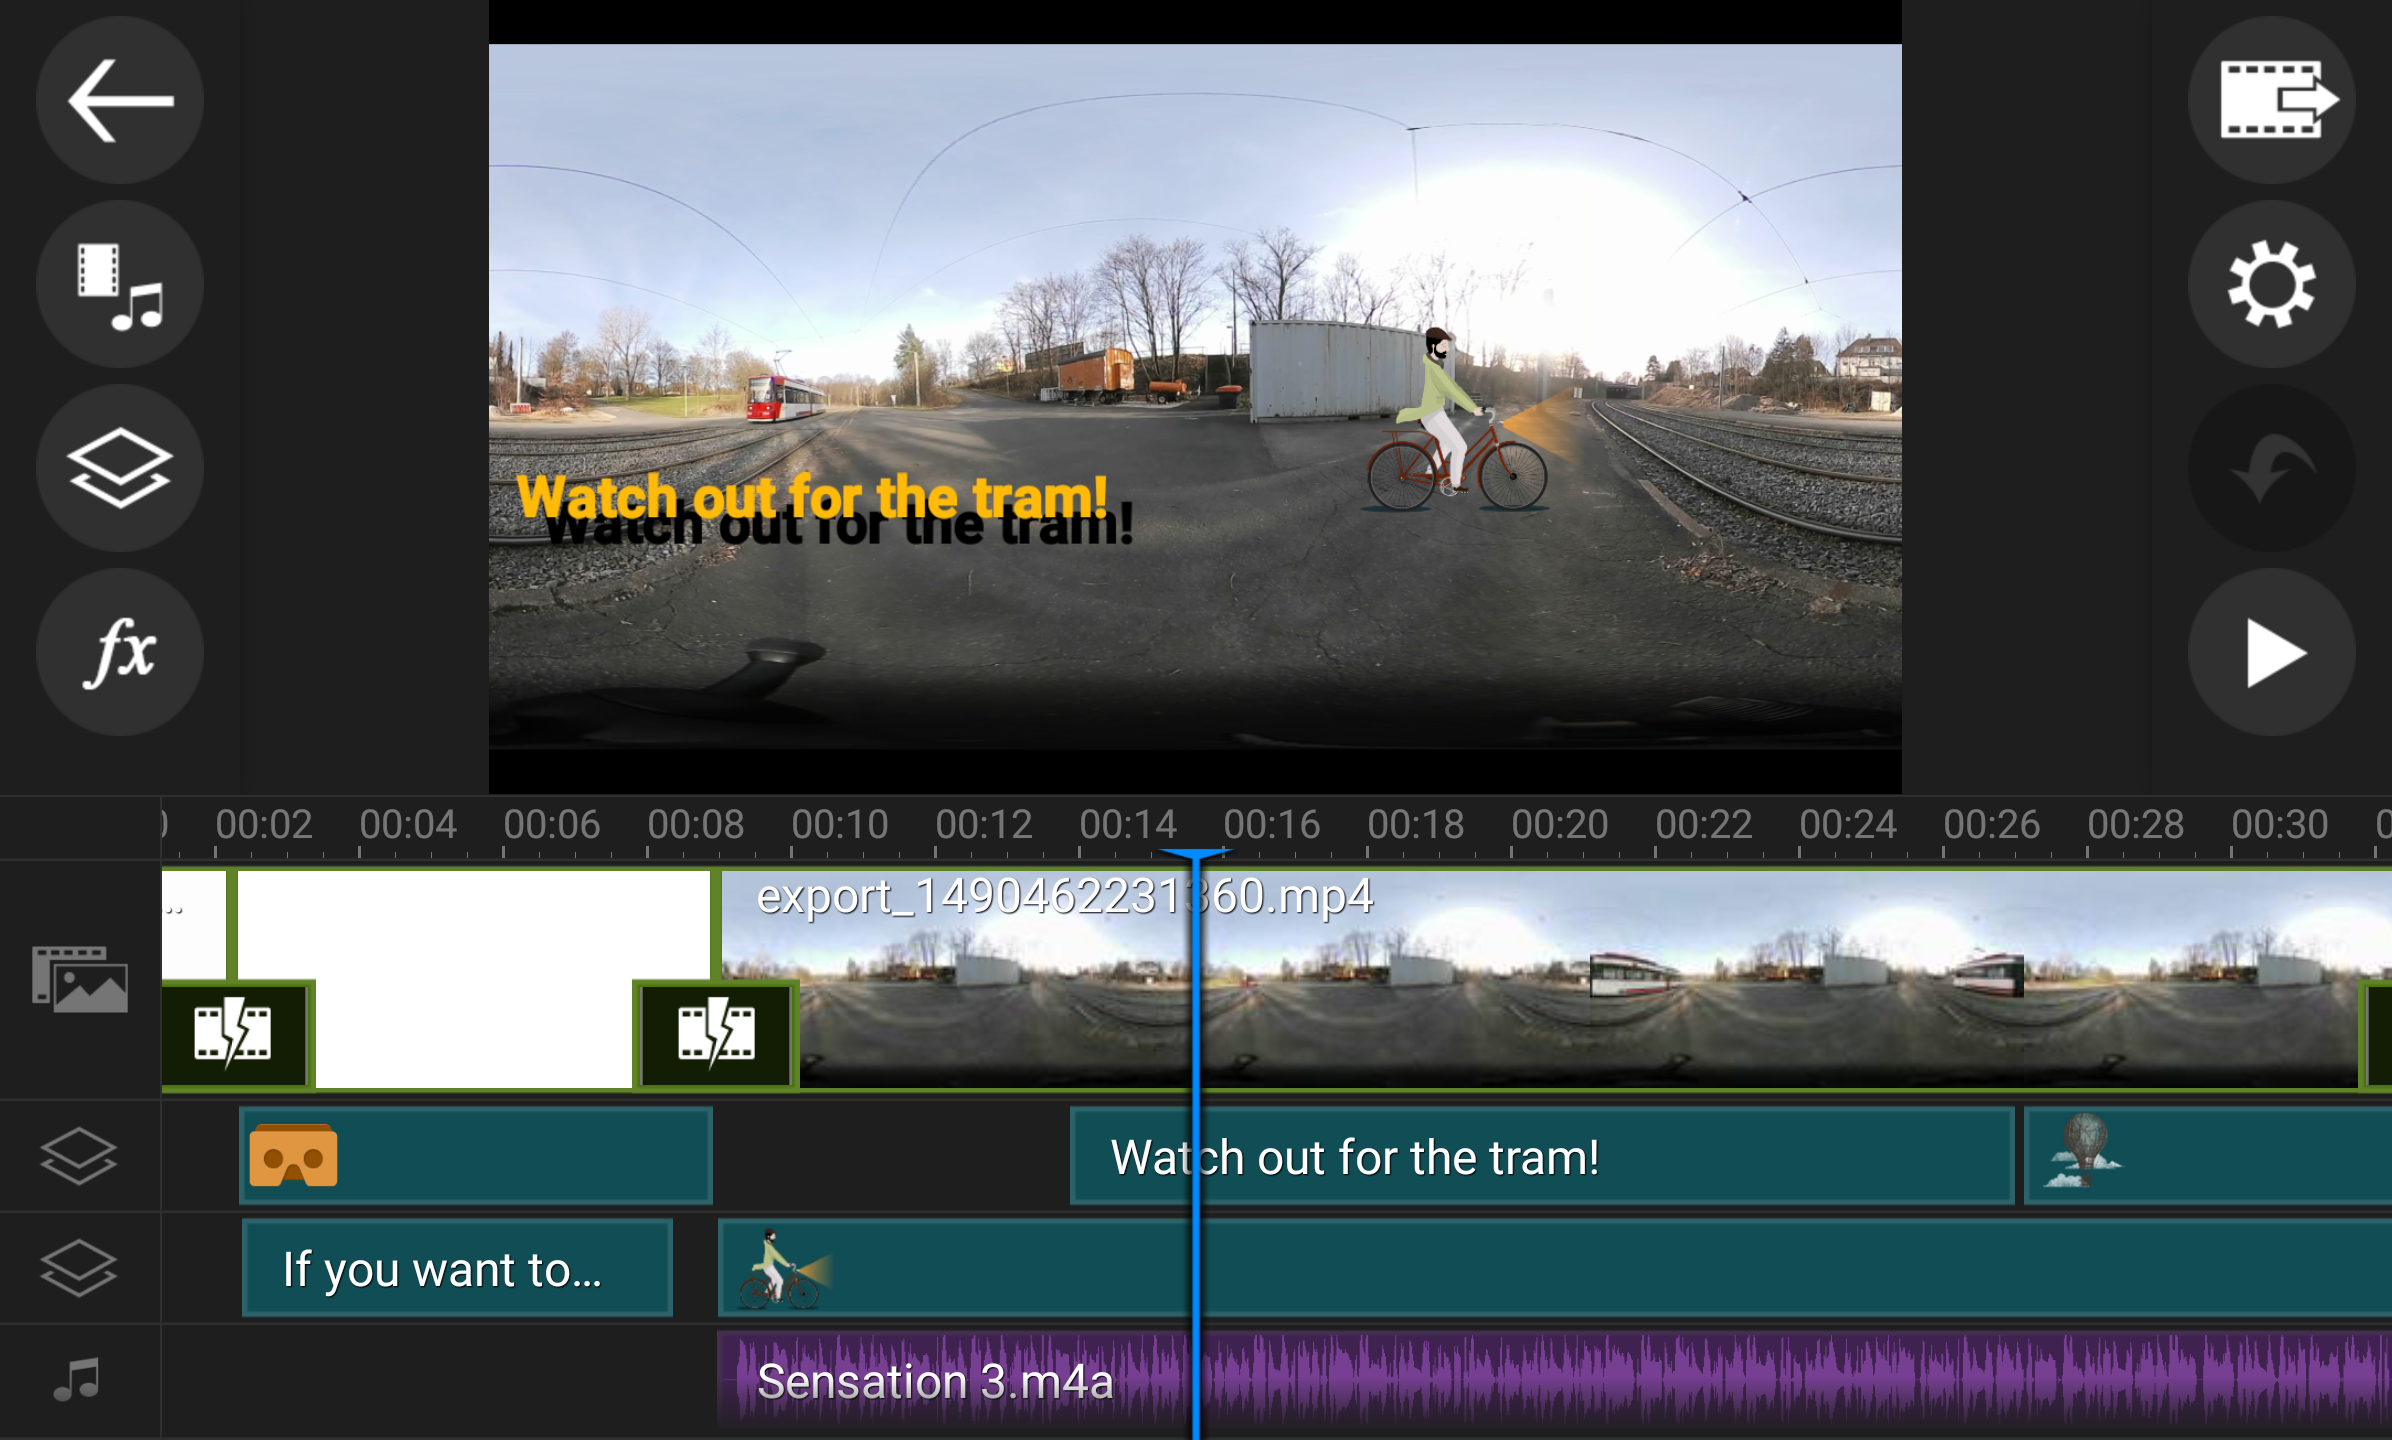
But let’s move on to the actual editing process using either PowerDirector or KineMaster. One thing that makes imagining the final product a bit more difficult than when using a dedicated 360 video editing app like Collect or V360 is the fact that the preview window will not display an interactive image that you can explore by swiping your finger on the screen or moving the device around like you would with the finished product in a 360 video player – all you see is the flat equirectangular image. So be ready for some trial & error work to find out how certain edits or the addition of titles/graphics will actually look like in the end! That being said, having a precise timeline layout instead of a simple storyboard plus the full feature set of those two advanced mobile video editing apps will give you a lot more freedom and control to create the video your way. You can record voice-overs or add music tracks and place them at specific points, you can add titles (they actually work surprisingly well in a 360 environment, just pay attention to where you place them and don’t make them too big or it will be very hard to read them!) and graphics and exactly define their length, size & style, you can apply transitions instead of plain cuts etc. etc.

 So you have created a super-sophisticated 360 masterpiece and joyfully sung Soundgarden’s “Black Hole Sun” the whole time – now you can just upload the video to YouTube or Facebook and get showered with Likes and Thumbs-Ups, right? Er … no. Because we’re pretty much coming full circle (absolutely no pun intended!) when I tell you you mustn’t forget about the metadata! After exporting your video from a regular Android video editing app, the metadata is gone and it needs to be re-injected so that the video player on YouTube or Facebook will actually display the video as an interactive 360 video and not in a flat equirectangular form. So there’s a problem but, alas, there’s also a fix: VRfix. This app is a one-trick pony and it will cost you a couple of bucks but you should be thankful that it exists because otherwise, there would be no happy ending for a mobile-only 360 video workflow when you have used PowerDirector or KineMaster to edit your video. After you have re-injected the 360 metadata into the video file with VRfix, you can finally upload the video to your 360 video platform of choice. If you want to know more about how VRfix works, check out their website.
Oh my, this is my first English language blog post here and it has become quite a monster despite the fact that I only wanted to cover some general basics. Well, well. I do hope you will find it useful in some way. Please feel free to drop questions and other feedback in the comments or hit me up on Twitter (@smartfilming). If you happen to find any mistakes or incorrect information in my article you’re also more than welcome to let me know about it. In that regard I want to finish by saying thanks to a couple of people I consulted during the process of writing this blog post: Pipo Serrano (@piposerrano), Paul Gailey (@paulgailey), Kai Rüsberg (@mojonalist), Sarah Jones (@VirtualSarahJ), Sarah Redohl (@SarahRedohl) and the 360 Rumors Blog (@360rumorsblog).
For an overview of all my blog posts click here.
Corrections:
- in an earlier version of this article it was said that KineMaster does not support 4K/UHD footage.
- in an earlier version of this article it was said that projects can’t be saved when using Collect or V360.

Thanks for the list. Here are few more normal video editing apps for Android:
https://www.primeinspiration.com/10-best-video-editor-apps-for-android.html
1 Pingback